|
COOPY » Guide
version 0.6.5
|
|
COOPY » Guide
version 0.6.5
|
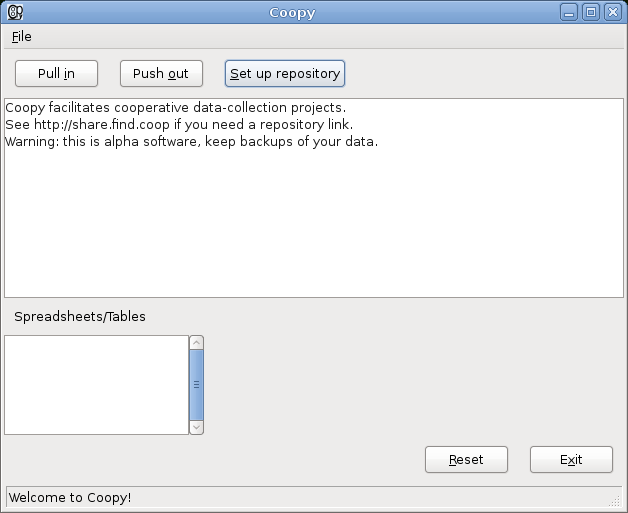
Suppose you pulled in the demo repository in Pulling in a repository with Coopy, then made modifications to it, but didn't want to (or couldn't) push those modifications back to the original repository.
One option is to fork the repository and store it elsewhere.
The procedure is just like Creating a new repository for Coopy, except with one wrinkle: when making your new repository, you need to give it a "project code" that is identical to the one you pulled in. You can find that code by clicking on the "Set up repository" link:
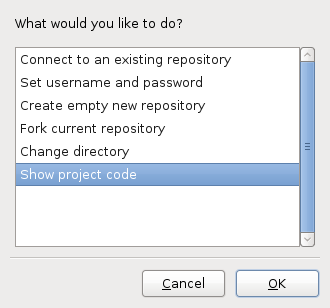
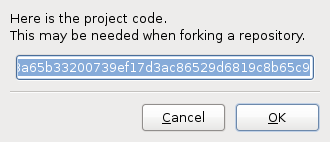
When we choose the project code option, Coopy gives us a big string of numbers and letters:
We will need the code a little later, don't worry about it for now, just be aware of where to find it. Clicking on the "Set up repository" link again and this time select the "fork repository" option:
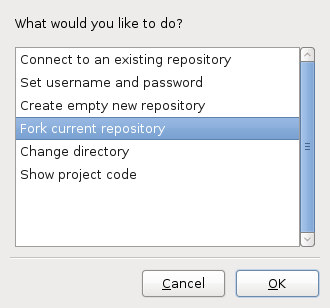
We get a list of possible hosts for our repository:
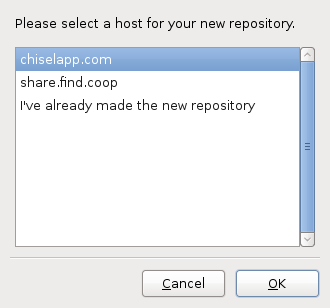
Suppose we pick the first one. Then we follow the same sequence as in Creating a new repository for Coopy, up to this point:
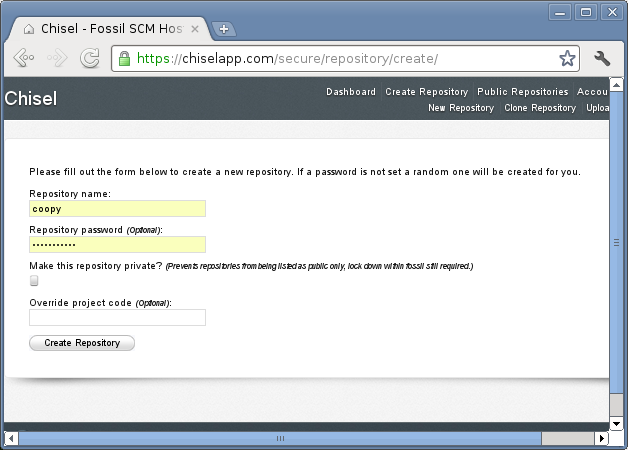
Here we get the project code from Coopy and fill it in in the "Override project code" slot. Then, we get the repository link just like in Creating a new repository for Coopy, and give it to Coopy:

Now, we continue on to provide a username and password to Coopy as in Pushing out a repository with Coopy. Done!
 1.7.4
1.7.4

